
The tap-zendesk extractor pulls data from Zendesk (Support) that can then be sent to a destination using a loader.
Alternate Implementations


Getting Started
Prerequisites
If you haven't already, follow the initial steps of the Getting Started guide:
Installation and configuration
-
Add the tap-zendesk extractor to your
project using
:meltano add -
Configure the tap-zendesk
settings using
:meltano config -
Test that extractor settings are valid using
:meltano config
meltano add tap-zendeskmeltano config tap-zendesk set --interactivemeltano config tap-zendesk testNext steps
Follow the remaining steps of the Getting Started guide:
If you run into any issues, learn how to get help.
Capabilities
The current capabilities for
tap-zendesk
may have been automatically set when originally added to the Hub. Please review the
capabilities when using this extractor. If you find they are out of date, please
consider updating them by making a pull request to the YAML file that defines the
capabilities for this extractor.
This plugin has the following capabilities:
- catalog
- discover
- state
You can
override these capabilities or specify additional ones
in your meltano.yml by adding the capabilities key.
Settings
The
tap-zendesk settings that are known to Meltano are documented below. To quickly
find the setting you're looking for, click on any setting name from the list:
You can also list these settings using
with the meltano configlist
subcommand:
meltano config tap-zendesk list
You can
override these settings or specify additional ones
in your meltano.yml by adding the settings key.
Please consider adding any settings you have defined locally to this definition on MeltanoHub by making a pull request to the YAML file that defines the settings for this plugin.
Access Token (access_token)
-
Environment variable:
TAP_ZENDESK_ACCESS_TOKEN
To use OAuth, you will need to fetch an access_token from a configured Zendesk integration.
See https://support.zendesk.com/hc/en-us/articles/203663836.
Configure this setting directly using the following Meltano command:
meltano config tap-zendesk set access_token [value]API Token (api_token)
-
Environment variable:
TAP_ZENDESK_API_TOKEN
How to get
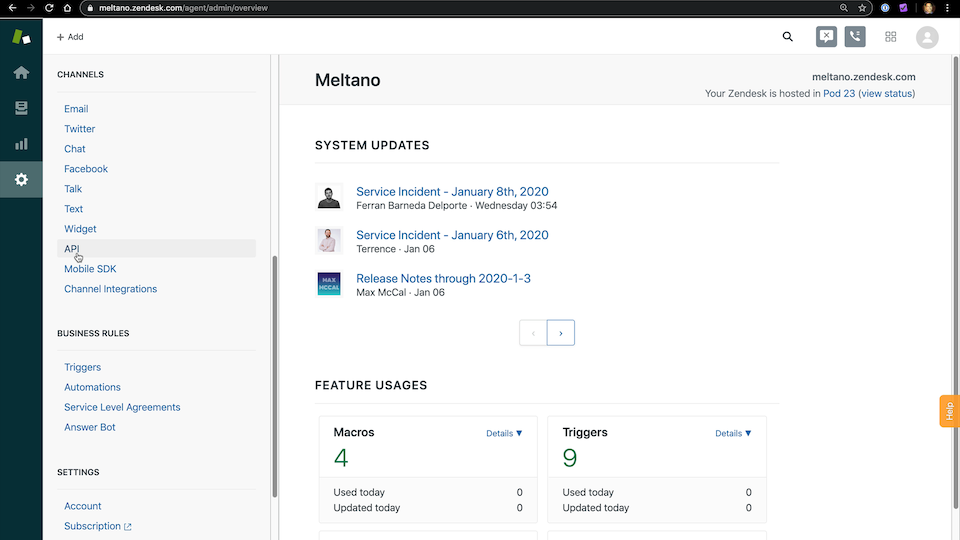
- Login to your Zendesk dashboard.
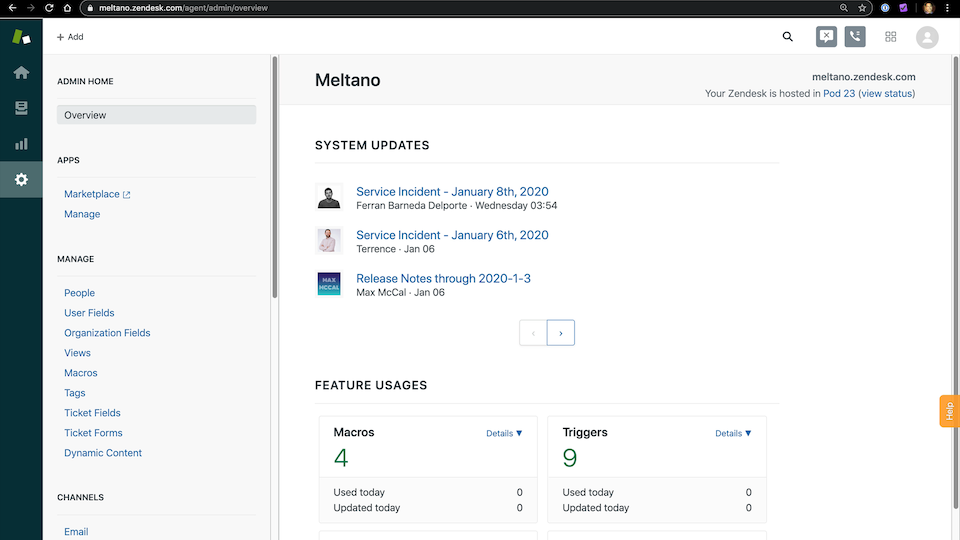
- On the left navigation, scroll down to the
Channelssection to click on theAPIlink. If you don't see this, your account does not have adequate permissions.
Ensure that
Token Accessis enabledClick on the
+button to create a new API token
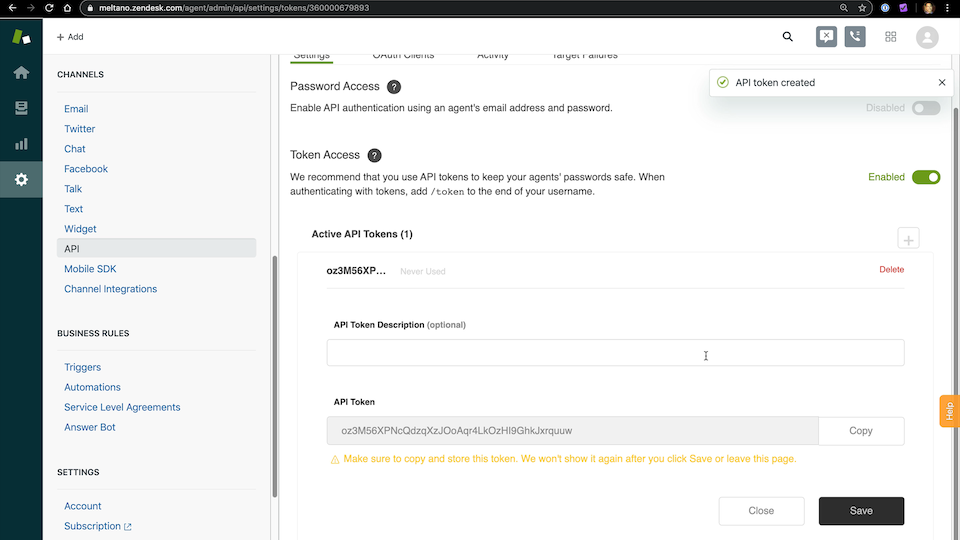
Add
Meltanoas the API Token DescriptionCopy the API token since it will not be shown again
Click
Savebutton to complete API key creation
See https://support.zendesk.com/hc/en-us/articles/226022787-Generating-a-new-API-token- for more details about generating an API Token.
Configure this setting directly using the following Meltano command:
meltano config tap-zendesk set api_token [value]Email (email)
-
Environment variable:
TAP_ZENDESK_EMAIL
This is the email you use to login to your Zendesk dashboard. For API Authentication, /token is automatically appended to the email address and is not required in the configuration.
Configure this setting directly using the following Meltano command:
meltano config tap-zendesk set email [value]End Date (end_date)
-
Environment variable:
TAP_ZENDESK_END_DATE
Sets a limit on how much data to extract in combination with start_date. If passed, data would be loaded for date >= start_date and date < end_date.
Configure this setting directly using the following Meltano command:
meltano config tap-zendesk set end_date [value]Start Date (start_date)
-
Environment variable:
TAP_ZENDESK_START_DATE
Determines how much historical data will be extracted. Please be aware that the larger the time period and amount of data, the longer the initial extraction can be expected to take.
Configure this setting directly using the following Meltano command:
meltano config tap-zendesk set start_date [value]Zendesk Subdomain (subdomain)
-
Environment variable:
TAP_ZENDESK_SUBDOMAIN
When visiting your Zendesk instance, the URL is structured as follows: SUBDOMAIN.zendesk.com.
You'll need this subdomain when configuring the extractor.
For example, if the URL is meltano.zendesk.com, then the subdomain is meltano.
Configure this setting directly using the following Meltano command:
meltano config tap-zendesk set subdomain [value]Sideloading for Tickets
Sideloading is a functionality provided by Zendesk to fetch related records in a single request more detail - https://developer.zendesk.com/documentation/ticketing/using-the-zendesk-api/side_loading/
There are two ways in which the records are returned:
- Within the same object as a column
- As a separate object
Here we have provided support for sideloading only the 1st type i.e. the attributes returned in the same object as additional columns
Sideload supported for tickets:
- comment_count
- dates
- metric_sets
- slas
To sideload an object a list can be passed in the metadata extra under `sideload-objects``:
extractors:
- name: tap-zendesk
  metadata:
    tickets:
      sideload-objects:
        - comment_count
        - dates
        - metric_events
        - slas
Something missing?
This page is generated from a YAML file that you can contribute changes to.
Edit it on GitHub!Looking for help?
#plugins-general